
Bathroom lighting planning
How Can a Bathroom Remodel Improve Night Lighting Near Shoup Ave and Vanowen St in West Hills?
Plan layered bathroom lighting that supports safer nighttime movement, comfortable grooming, and flexible control.
Quick Answer
The most effective bathroom night lighting remodels use layered lighting: a low-level guidance light for safe movement, separate vanity lighting for grooming, and general or shower lighting for full visibility when needed. Independent switches or compatible dimmers let a household use the lowest comfortable light level at night without sacrificing a brighter option for cleaning, shaving, makeup, or showering.
For a broader scope that coordinates layout, finishes, and lighting, see Renoa’s bathroom remodeling service.
01 / Nighttime comfort
Why a Single Bright Ceiling Light Often Feels Wrong at Night
A bathroom remodel can make nighttime use more comfortable by separating gentle pathway lighting from brighter grooming and shower lighting. Instead of turning on one overhead fixture that creates glare and wakes everyone up, the plan can use low-mounted light, dimmable vanity fixtures, and controls that match how the room is used. For homeowners near Shoup Ave and Vanowen St, the useful starting point is not choosing a bulb first. It is deciding what should light the route from the door to the toilet, vanity, and shower, and how bright each zone needs to be.
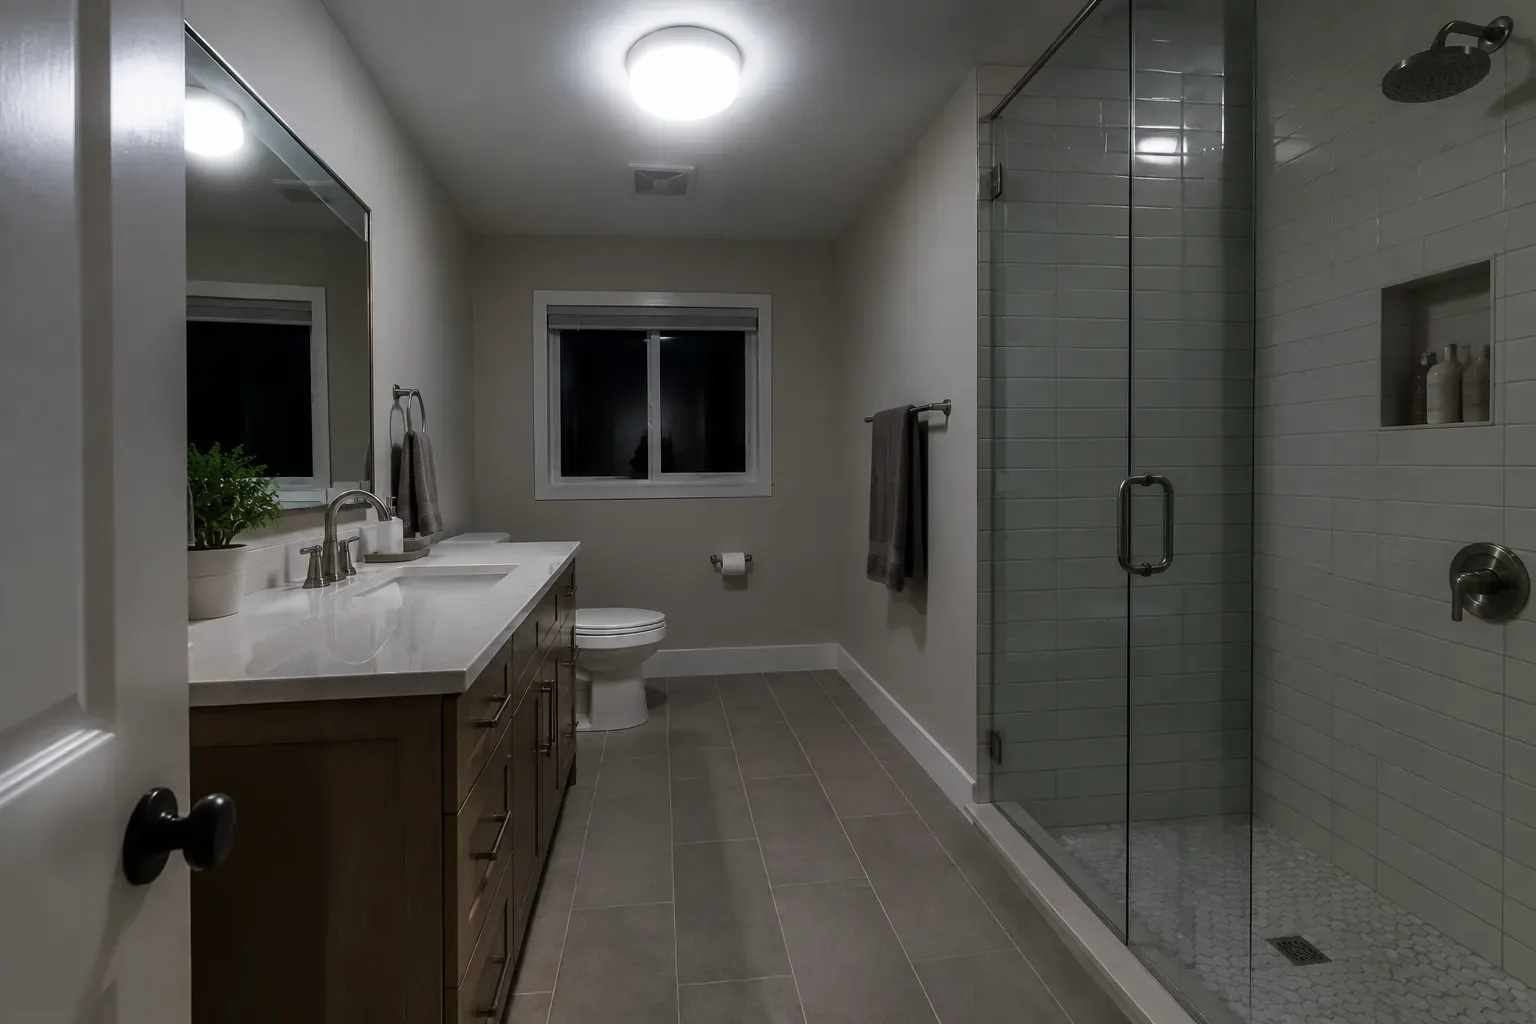
A central ceiling fixture can provide useful general illumination, but it is rarely the best only source of light. Its direct light can create glare on glossy tile, mirrors, and countertops. It can also leave the face in shadow at the vanity and make the transition from a dark bedroom feel abrupt.
Nighttime lighting has a different job from daytime grooming light. It should make changes in floor level, the toilet, the door opening, and the route through the room easy to see without flooding the entire space with light. That usually means placing a modest amount of light lower in the room and giving it its own control.
This is a design recommendation, not a code rule. The exact fixture selection, wiring method, and locations must be evaluated for the room’s layout and applicable electrical requirements.
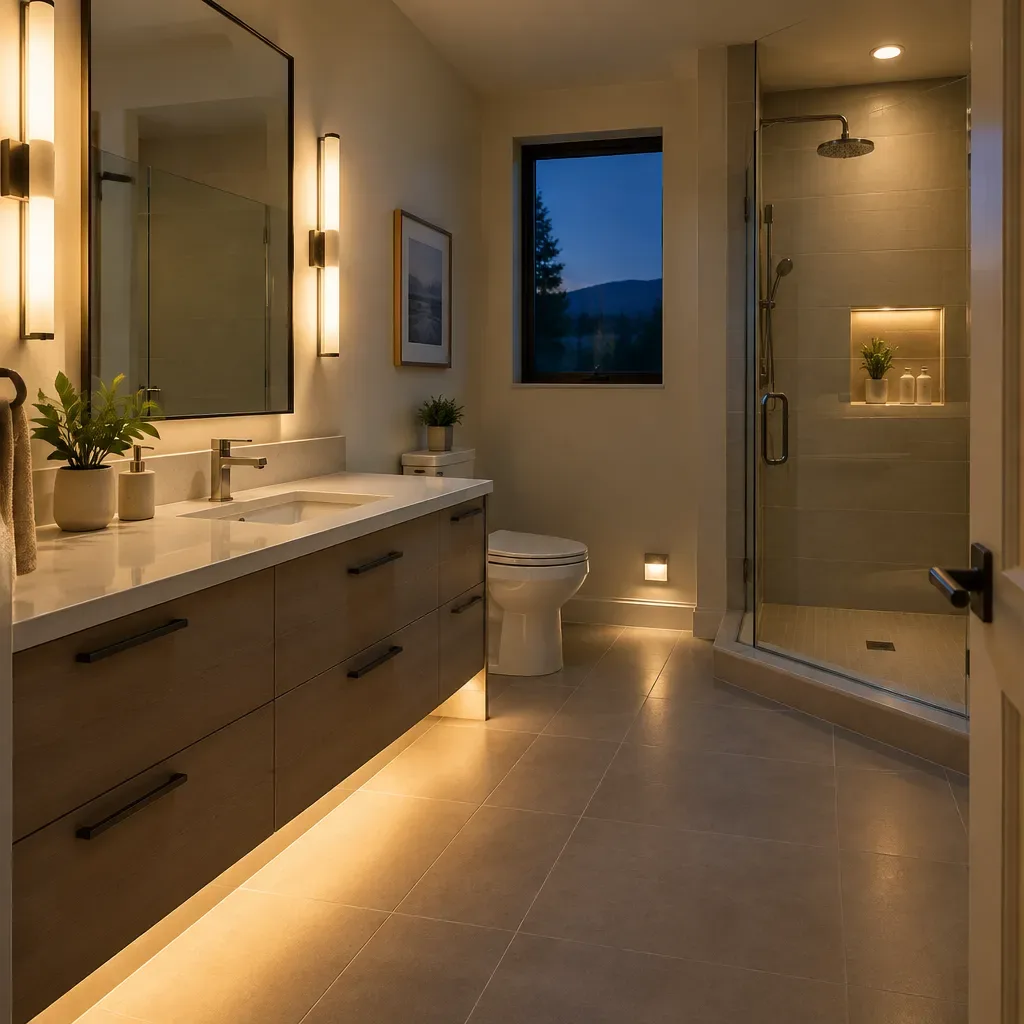
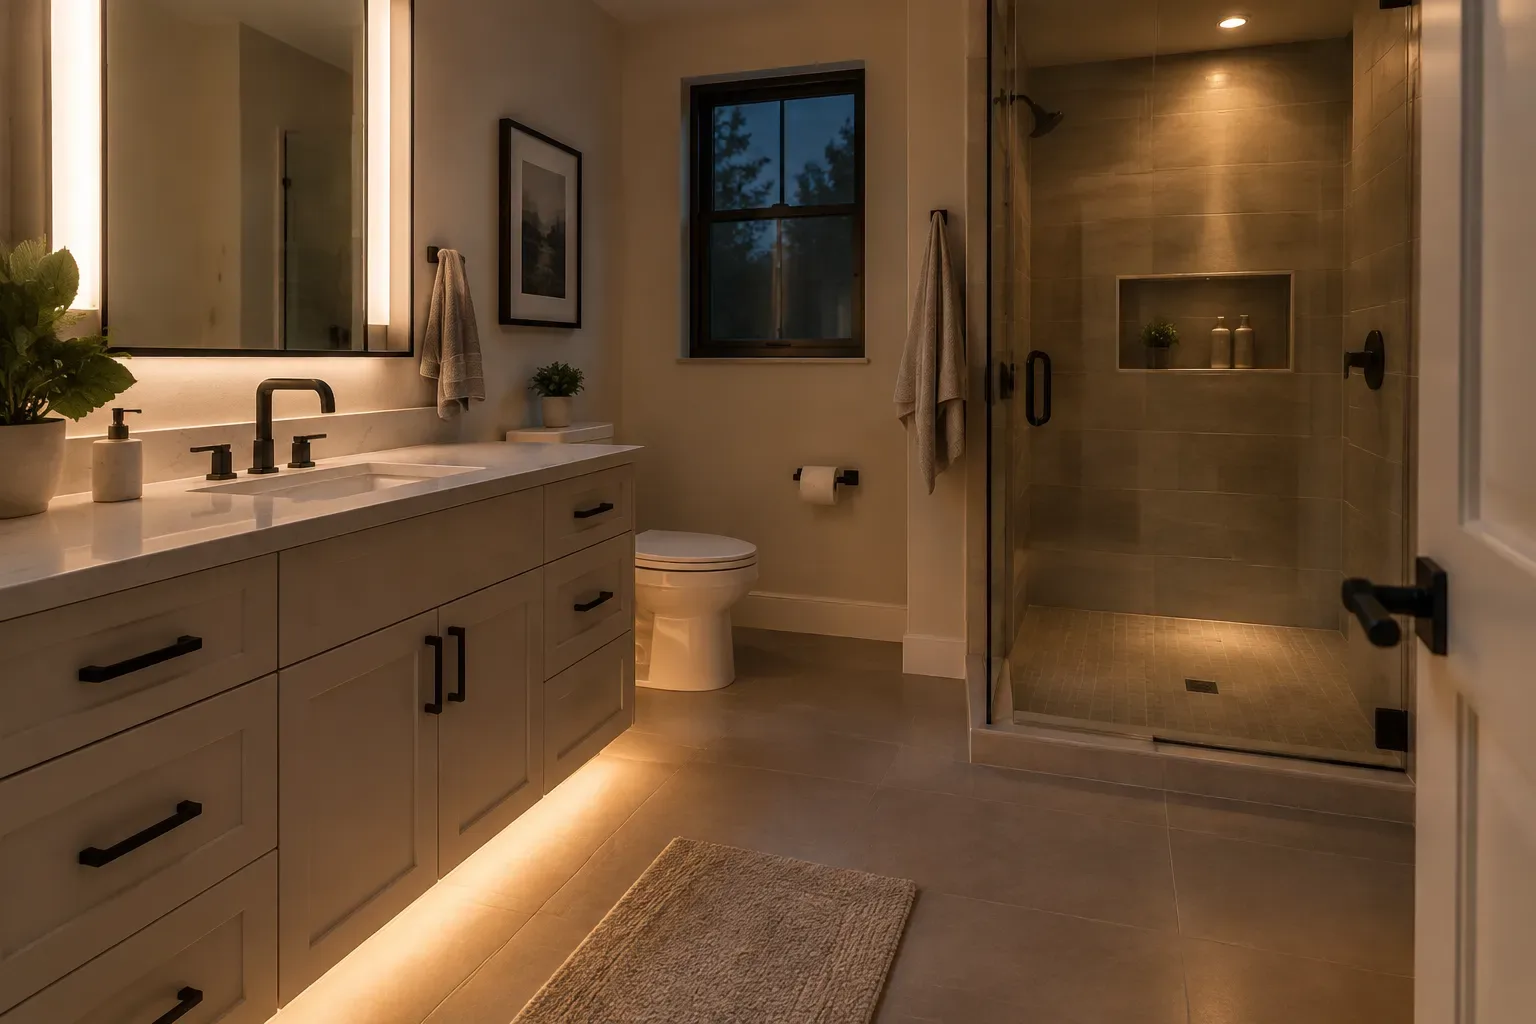
Hypothetical before concept: one bright ceiling fixture is used for every nighttime visit. Hypothetical after concept: separate low-glare pathway, vanity, and general-lighting layers use independent controls, allowing a lower comfortable light level after dark.
02 / Layered planning
Build a Layered Bathroom Lighting Plan
A practical plan divides the room into tasks instead of expecting one fixture to do everything.
Low-level guidance lighting
This layer helps someone move through the room after dark. It may be integrated below a vanity, near a toe-kick, or at a wall location chosen to illuminate the walking path without shining directly into the eyes.
Vanity task lighting
Lighting at or near the mirror improves everyday grooming. Fixtures placed to reduce facial shadows are usually more useful than relying on a recessed ceiling light directly behind the person using the mirror.
General and shower lighting
A ceiling fixture or other ambient source supports cleaning, dressing, and full-room visibility. Shower lighting may be appropriate in some layouts, but fixture suitability and placement must be reviewed for that wet area.
The layers do not need to operate together. In fact, separate controls are what make the system useful at night. A household might use only the pathway light for a late-night visit, then turn on the vanity and general lighting for the morning routine.
03 / Path lighting
Choose Low-Glare Pathway Lighting Based on the Room
Several approaches can provide nighttime guidance. The best choice depends on the vanity design, wall construction, tile scope, wiring access, and how easily the fixture can be cleaned or serviced later.
| Option | Best use | Main advantage | Planning consideration |
|---|---|---|---|
| Toe-kick lighting | Floating or recessed vanity bases | Directs light toward the floor with a concealed appearance | Requires coordination with cabinetry, wiring, and access to components |
| Under-vanity lighting | Wall-mounted vanities | Creates a soft pool of light below the cabinet | Light can reflect off highly polished floor finishes |
| Wall-level fixture | Clear wall area along the route | Can define the path without altering the vanity | Fixture location should avoid direct glare and interference with doors |
| Indirect cove or niche lighting | Bathrooms already receiving finish work | Produces an architectural, indirect effect | Usually adds framing, drywall, tile, or trim coordination |
The goal is not to make the floor look bright. It is to make the route understandable at a comfortable light level. A fixture aimed outward from the vanity base may look dramatic but can produce a visible hotspot. A concealed source aimed downward is often more restful.
04 / Vanity lighting
Plan Vanity Light for Faces, Not Just the Mirror
Vanity lighting affects nighttime use and daily tasks alike. A bright recessed light over the sink can reflect in the mirror while casting shadows under the eyes, nose, and chin. Side-mounted fixtures, mirror-integrated light, or a balanced combination of side and overhead light can improve visibility at the face.
A separate dimmer is especially useful here. The same vanity lighting may need to be restrained during a late-night visit but brighter for grooming. Before committing to a dimmer, confirm that the selected LED fixture or bulb is rated for dimming and compatible with the control being specified. Not every LED product dims smoothly, and incompatible combinations can flicker, buzz, or have a narrow dimming range.
Consumer product information from ENERGY STAR’s lighting guidance can help homeowners compare efficient lighting products, but it does not replace a lighting layout or electrical review.
05 / Wet-area decisions
Treat Shower Lighting as a Location-Specific Decision
A shower can benefit from dedicated lighting when a ceiling fixture outside the enclosure leaves the area dim or shadowed. Yet this is not simply a matter of adding a recessed can light. The fixture’s listing and location rating, the shower configuration, ceiling height, vapor exposure, wiring method, and applicable code requirements all matter.
For example, a bathroom with a tall ceiling and an enclosed shower may need a different approach from one with an open shower area and abundant daylight. A professional can determine whether the selected fixture is appropriate for the actual location and coordinate the work with the broader ceiling, waterproofing, and finish plan. Homeowners should not open ceilings or alter energized wiring to investigate these questions.
California’s Building Standards Code resources are the official starting point for confirming current state-code requirements. The applicable local authority and project scope determine which provisions and permits apply.
A finished lighting plan should show how the shower, vanity, toilet, and walking route work together at night, rather than treating each fixture as an isolated decorative choice.
06 / Controls
Use Controls That Support Real Nighttime Routines
A well-located fixture loses much of its value if its controls are inconvenient. Controls should be discussed early, before walls are closed and tile or cabinetry decisions limit switch locations.
Separate switches
Separate controls provide the most predictable choice. One switch can serve the low-level path light, another the vanity, and another the general or shower lighting. This approach is easy to understand and lets each person choose the needed layer.
Dimmers
Dimmers let one fixture serve more than one mood or task. They work best when the fixture and dimmer are selected as a compatible system. Dimming may be preferable to an automatic sensor in a bathroom used by people with different nighttime preferences.
Occupancy and vacancy controls
A sensor can be convenient when hands are full or when someone enters the room at night. However, an occupancy sensor may activate brighter lights than desired, while a poorly located sensor may not respond as expected. A vacancy-style control, which requires a person to turn the light on but turns it off automatically later, may fit some households better. Product behavior and local requirements should be confirmed before selection.
A second common scenario involves a shared bathroom where one household member wants a motion-triggered night light but another dislikes automatic illumination. In that situation, a dedicated low-level fixture with a manual switch or a sensor with a clear override may be more flexible than automating all bathroom lighting.
07 / Teaching example
A Hypothetical Small-Bathroom Lighting Layout
Imagine a compact bathroom with a door opening toward a vanity, a toilet beside it, and a shower at the far end. This is a teaching example, not a documented project or a universal layout.
- 1
Path layer
A concealed, low-level light below the vanity turns on independently to show the route from the door to the toilet.
- 2
Vanity layer
Mirror-side or integrated lighting is placed on a separate dimmer for grooming and for softer nighttime use.
- 3
General layer
A ceiling fixture provides full-room light for cleaning and dressing.
- 4
Shower layer
If the shower needs its own illumination, a qualified professional verifies the fixture rating and installation requirements for that exact location.
This arrangement avoids a common mistake: putting every fixture on one switch. It also helps the remodel team coordinate electrical rough-in before finishes are installed. If the work is part of a larger project, full-home renovation planning may help coordinate lighting decisions across adjoining rooms.
08 / Scope and code
Requirements, Recommendations, and Permit Questions
Comfortable nighttime lighting is largely a design choice. Fixture ratings, electrical installation, required controls, and permit obligations are different matters. They depend on the work being performed, the current code edition, and the authority with jurisdiction over the property.
Do not assume that a simple fixture replacement has the same review requirements as new circuits, relocated switches, recessed fixtures, or a bathroom reconfiguration. Before finalizing scope, ask the remodel team what electrical changes are proposed and which authority will review the work if a permit is required. Readers researching permit questions can also review Renoa’s bathroom renovation permit article, while confirming whether LADBS governs their specific property.
09 / Consultation preparation
What to Prepare Before Discussing a Lighting Remodel
A few details help turn a general idea into a useful planning conversation:
- Room length and width, ceiling height, and the shower footprint.
- Vanity width, mirror size, and whether the vanity is wall-mounted, recessed, or sits on the floor.
- Photos taken in the daytime and at night from the doorway, vanity, and shower area.
- Existing fixture and switch locations, including which lights currently operate together.
- Notes about glare, dark spots, a difficult path, or a light that wakes a sleeping partner.
- Whether a dimmer, a manual low-level light, or an automatic control is preferred.
- Any planned tile, cabinet, ceiling, or layout changes that could affect wiring access.
Lighting scope can affect cost through fixture count, new wiring, ceiling access, control selection, cabinetry coordination, and finish repair. For broader budget context, see the bathroom remodel cost breakdown for Woodland Hills homeowners.
Next Step
If nighttime bathroom use is part of a planned remodel, contact Renoa Design & Construction with room photos, rough dimensions, current switch locations, and a description of the nighttime routine you want the lighting to support.
Frequently Asked Questions
What is the best bathroom lighting for nighttime use?
The best approach is usually a separate, low-level pathway light paired with dimmable or independently controlled vanity and general lighting. A low-mounted source can show the route through the bathroom without the glare of a bright overhead fixture. The right placement depends on the vanity, floor finish, door swing, and walking path. A remodel plan should also account for fixture access and the actual bathroom electrical layout.
Should bathroom night lights be warm or cool?
A warmer appearance is often preferred for nighttime comfort because it can feel less stark than a very cool, bright source. That is a personal design preference, not a code requirement. More important than color appearance is controlling glare, aiming the light away from the eyes, and keeping the pathway visible. View fixture samples in the room when possible, because tile and paint can change how the light appears.
Can a bathroom remodel add motion-sensor lighting?
Yes, a bathroom remodel can include sensor-based lighting, provided the control, fixture, wiring, and applicable requirements are appropriate for the project. A sensor is most useful when it activates a dedicated low-level light rather than every bright fixture in the room. Discuss manual override options and sensor placement, since a control that activates too easily or fails to detect normal movement can become frustrating.
Where should vanity lights be placed to reduce shadows?
Lights placed at the sides of the mirror or integrated around it can provide more even facial illumination than a single ceiling fixture behind the user. The mirror width, ceiling height, sink location, and surrounding storage all affect the layout. Brightness and diffuser design matter as well. A lighting plan should balance clear grooming visibility with glare control for nighttime use.
Are recessed lights above a shower safe?
They can be appropriate only when the selected fixture and installation are suitable for that exact wet or damp location and comply with applicable requirements. Do not choose a shower fixture solely by appearance. A qualified professional should verify the fixture rating, location, wiring, ceiling conditions, and project scope before installation. The California building-code resource is a useful official reference for confirming current requirements.
Does a bathroom lighting update require a permit?
Sometimes. A project that changes circuits, adds wiring, relocates switches, or alters other building systems may be treated differently from a limited fixture replacement. The answer depends on the scope and the authority with jurisdiction over the property. Ask before work begins, rather than relying on a general online rule. The relevant permit authority should confirm the requirement for the specific address and scope.
How can I avoid glare from bathroom pathway lighting?
Use a concealed or shielded source that directs light toward the floor or wall, not toward eye level. Under-vanity and toe-kick lighting can work well when the fixture is recessed or aimed carefully. Highly reflective tile, polished stone, and glossy cabinet finishes may show hotspots more readily, so review the lighting effect with finish samples when possible. Dimming also gives the household a way to reduce intensity.
Can low-level lighting be added without replacing the whole bathroom?
Sometimes, but the feasibility depends on access to wiring, the vanity construction, wall and ceiling conditions, and how much finish repair would be needed. A full remodel makes it easier to coordinate concealed lighting before tile, cabinetry, and drywall are complete. For a limited update, a professional can assess whether there is a practical route for wiring and whether the resulting repair work fits the desired budget and appearance.
What information should I bring to a bathroom lighting consultation?
Bring photos of the bathroom in daytime and nighttime conditions, room dimensions, ceiling height, vanity and mirror dimensions, and photos of current switches and fixtures. Describe what happens during an actual nighttime trip, such as glare at the mirror, a dark path to the toilet, or a light that disturbs another person. Those details help distinguish a control problem from a placement, fixture, or broader layout problem.
Resources
- California Building Standards Code resources
- California Building Energy Efficiency Program
- ENERGY STAR’s lighting guidance